Thread Rating:
  • 1 Vote(s) - 2 Average
  • 1
  • 2
  • 3
  • 4
  • 5

Racing Rarebears a fast and simple build
#1

Thought I'd put up a couple of pic of how I put together my Racing Rarebears.

These are the naked Rarebears that come with no decals or covering.

The first thing to do is remove all the little nibs that are dotted over the surface of the foam parts. These are formed by holes in the mould to let the air out as the parts are pressed into shape. They cause a fair bit of drag if left on, so because we want a slippery, fast plane, off they come!!
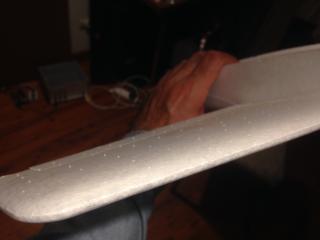
   

You can see from this photo, just what I'm talking about. The best way to remove them is with a soft block and some 800 grit paper. This takes them off with out scratching the surface or digging or tearing into it. You may also notice a bit of a dag along the trailing edge of the ailerons, like a bit of flash that makes the trailing edge look wider than it is. It's hard to see in a photo but if you run your finger back past the trailing edge you can defiantly feel it. I Remove this one as well.


Another thing with some Rarebears is that the carbon spar strip is proud of the underside of the wing. This isn't much good for going fast and needs to be fixed.


So I carefully sand it down flush with some 120 grit paper glued to a block of plywood
I don't cut into the wing, just sand that little bit of spar till it's flush. If your worried about diging into the wing a strip of masking tape down either side of the spar will protect the foam and make it easy to only attack the carbon that's sticking out. It will also stop the black carbon dust staining the snow white foam.
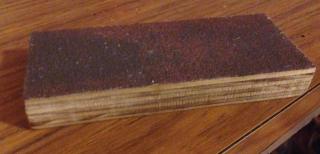
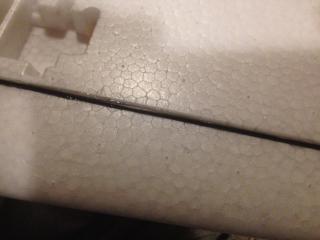


Here's the block I use for sanding the spar. It's much causer than the one I use to take the little nibs off.

Rarebears need a good colour scheme!!

They are small and fast, so colours that aid in orientation are a must!!

With 4 of the same airframes in one race, it pays to be flying one that stands out and is easy to track. Every thing helps and everything needs too, when your racing.

My colour scheme is red white and blue on top and yellow and blue on the bottom. I use acrylic lacquer for painting my rare bears. This is automotive paint and is available in touch up cans from supacheap auto. It doesn't attack the foam at all and is a fast and extremely durable finish. It's very nice to spray much better than the cheap enamels that you get from bunnings. It doesn't bleed under masking tape and dries very rapidly as well.


“The knack of flying is learning how to throw your machine at the ground and miss.”

"When once you have tasted flight, you will forever walk the earth with your thoughts turned skyward, for there you have been, and there you will always long to return."  ~Leonardo Da Vinci
Reply
#2

Did a bit more sanding this evening some masking and some painting.

I don't put a lot of paint on, just one coat and just enough to make the colour even. Paint is surprisingly heavy so I try to keep it to a bear minimum.

I think it's a lot easier to paint the separate parts before they are glued together. I took some care to mask up so I didn't get paint where the glue bond is going to be.


I also removed the motor mounts from the airframe. they looked to be bonded in with some kind of contact cement. Both of my earlier ones came loose and had to be re-bonded in.

When the Rearbears comes from the factory there is a heap of down thrust and a heap of right thrust set on the motor. It really wants to be set up zero , zero for racing. This makes them just slightly trickier to hand launch but like this they fly much more nicely at speed!! And speed is what they will be doing most of the time they are in the air!!

“The knack of flying is learning how to throw your machine at the ground and miss.”

"When once you have tasted flight, you will forever walk the earth with your thoughts turned skyward, for there you have been, and there you will always long to return."  ~Leonardo Da Vinci
Reply
#3

Did a bit more work on the RareBears this evening. A 3rd one turned up so now I've got 3 to put together. Smile Smuzz I owe you one !!

I took the 3 motors apart to pot the windings. This makes the motors run much more quietly. I guess it stops the windings from vibrating as much as they normally do, after all they have quite powerful and rapidly changing magnetic fields in those motors when they are going full peg. I have noticed that once you do this, the motors last almost indefinitely and I think it makes them go a just a little bit better as well. All that energy that was used for making noise has to go somewhere hopefully some of it goes into thrust.

It's good when they are a little quieter too, people thing they are going slower than they actually are, which can be a bit of a surprise and it makes you look good when you get a decent time with a plane that sounds a bit slower than all the rest Wink

I just use 5 min or 15 min epoxy and put it on the most accessible end first. being careful no to get it on the laminations. It can easily be removed if a little bit gets on there so it's not the end of the world if some does.

One thing I did notice was, when I removed the motors, from their mounts, was that almost every screw was loose. Even if you didn't remove the motors for some attention you'd want to check that the screws were snug, these ones were not !!

My previous two rare bears flew pretty well with this set up and I raced and practiced a lot, for more than a year and a half with the same two motors, once I potted them they just seemed to last.

once the epoxy on this side is cured I'll turn them over and do the other end

Before Potting the first end
   

The first end is done


“The knack of flying is learning how to throw your machine at the ground and miss.”

"When once you have tasted flight, you will forever walk the earth with your thoughts turned skyward, for there you have been, and there you will always long to return."  ~Leonardo Da Vinci
Reply
#4

are they the silver motors , with the angled front casing , or are they squared off on the front casing ?

ideally they should be silver motors with an angled front casing ? Wink

patience !!Biggrin paaatience !!Paranoid paaaaaatience Tounge paaaaaaatieeence Lol dooooohhhh !!! Upset


DANGER WIFE CAN READ FORUMS . love you darling . sig changed .
Reply
#5

Thanks JV for posting that info. Please tell me do you just let the epoxy gravitate down towards the middle from one end and then the other or what?

Do you thin the mix at all?

Good stuff!!!

"Fly it like you Stole it"
Reply
#6

Quote:Posted by rocket41 - Today 02:14 PM
Thanks JV for posting that info. Please tell me do you just let the epoxy gravitate down towards the middle from one end and then the other or what?

Do you thin the mix at all?

Good stuff!!!

Yep that's pretty much it, If I see anywhere where it doesn't meet in the middle after I do the back end, I add some in there later. I don't use anything to thin it down with, I find it's thin enough as it is.

Here's the back of one of them with epoxy on the windings


I've decided to use FRsky recievers in these two rarebears. I raced the other two for nearly 2 years with 6 channel orange receivers and no satellites. They worked fine except on two occasions, the first time was when a pilot and his caller walked close to me and got between my radio and my rarebear for a very short time. I lost the radio link momentarily and only just managed to save the model. The other time this happened was when a car pulled up right next to me when I was flying and got between my radio and my model. I was not so lucky this time the model crashed. What you don't realise is that you hold the radio fairly low down at around waist height and it's not that hard for something to get in-between the receiver and the TX and with 2.4GHz you really should have line of site. I think FRsky is a more robust system than the orange gear. However the orange receiver and spectrum DX6i worked well with those rarebears for hundreds of other flights.

This is the receiver I'm going to use


An important thing to consider with these models is how the linkages are set up. They must have no play because at full speed you have very small throws on the surfaces and any slop is going to cost heavily in the control department.

For Pylon racing you set up high rates for take off and landing and low rates for high speed. you want the elevator set so that on low rates when the plane is going at flank speed you can pull full elevator and it wont drop a wing or snap or do anything silly at all. It should just groove swiftly around the turn. If it doesn't the elevator has too much throw, I cant emphasise this enough!!

Full aileron on low rates and at top speed needs to provide about the same roll rate as you'd expect from a trainer not more. Fast in roll will make a plane slower around the course!!

Having such low rates will make it very slow to respond at landing speed and you might not even have enough elevator to flair, so you need to set up high rates with enough throws to allow landings in lumpy and windy conditions because racing doesn't get called off due to wind until the pylons fall over.

Anyone setting one of these planes up for the first time is more than welcome to give me or one of the other pylon guys a yell and we'll be more than happy to give you hand with the first few flights to get things set up nice!! It makes a lot of difference when you have a nicely dialled in plane to race or even a sports rarebear is a joy to fly one it's set up just so.

Back to the linkages. The control horns that come with the Rare Bears are all the same. There is no difference between those used for elevators and ailerons. They all have the problem too
the bottom 3 holes are way too big and the top one is way too small (forget the bottom three, well fix the top and use it)


when I put my rarebears together the clevises all attach to the control horns and the Z bends all go to the servos.

One of these pin chucks (about $5 from HK) and a 1.3 mm drill is what I use to open out the holes. You don't need power tools it's really easy to drill small holes out like this


The wire at the Z bend is smaller and you need a 1.2 drill for the arms on the servos. Drilling the holes like this will make them neat with no slop at all. They will be firm, but not too tight, just what you want!!

The z bend needs to go in close to the servo shaft as well, you want to use as much of the servo's throw as you can. Because this way you get both the best torque at the control surface end and the best resolution as well, It's important to do this if you want a nice flying race plane!!

When your flying it's essential to use all of the sticks throw. It's bad technique to fly using just a little bit of stick around the middle on either pitch or roll and believe me it will cause you grief!!

The RareBears have a nice little slot formed in the control surfaces that makes placing the control horns very easy I just bond them in with epoxy and they have never let go. I do put a bit of a fillet on just to achieve a little more footprint on the foam.


There are many ways to put a RareBear together. I'm not suggesting that this is the only way or the best way. It's just what I found to work well and my machines were both reliable and reasonably fast. They managed to come first at Nowra early last year and then at Richmond. Adrian C did manage faster times at Richmond but was racing a plane of different class in the FFC heats. I was lucky and only got one cut all day, which helped enormously!!

Here's some video from that day at Richmond. It was a pearler weather wise too!!

http://www.youtube.com/watch?v=Q10syyUanB4

(28-05-2014, 02:15 PM)wingtipper Wrote:  are they the silver motors , with the angled front casing , or are they squared off on the front casing ?

ideally they should be silver motors with an angled front casing ? Wink

Two of them are silver, the other is the new red motor, there is an old red motor as well. There's not that much difference between motors.
Weather the prop and spinner are nicely balanced makes probably more difference. But I think your right the silver motors are pretty good Smile As long as they are stock motors that came with the original kit they are all legal

“The knack of flying is learning how to throw your machine at the ground and miss.”

"When once you have tasted flight, you will forever walk the earth with your thoughts turned skyward, for there you have been, and there you will always long to return."  ~Leonardo Da Vinci
Reply
#7

I put the tail group on them this afternoon. I just bonded them on with thick CA, that has worked very well in the past. Just gotta make sure that the elevator linkage is connected and the keeper is on before bonding the stab to the fuse!!


The motors went back together nicely, just got to watch those little E clips, best to get some spares as they can have a tendency to time warp a long way into the future.


I've still got to cut the shafts off that hang out the back of them. I do this so it doesn't impale the lipo pack if the model crashes. The last thing I want is a crash in long dry grass followed by a fire from an impaled lipo. I'll use a cut off wheel and the dremel for that job.

“The knack of flying is learning how to throw your machine at the ground and miss.”

"When once you have tasted flight, you will forever walk the earth with your thoughts turned skyward, for there you have been, and there you will always long to return."  ~Leonardo Da Vinci
Reply
#8

The mounts needed to be cleaned up as the old glue is quite tacky and probably wouldn't make for a good bond with the epoxy if left on. I scraped it off with an exacto knife and remove the shine off the plastic mount as well, This also help rough it up for a better bond.
A lot of people say epoxy doesn't stick well with EPO but I've never had a problem with it as long as the surface is clean and roughed up a little with glass paper it seems to stick ok. CA is probably better but it doesn't fill gaps like epoxy does and when the considerable amount of right and down thrust is removed it leaves a bit of a gap between the mount and the foam that needs to be filled.

I put some cling wrap between the motor and the mount then screw it together using only 2 screws. I'll tale it out later to remove the cling wrap and make sure the motor doesn't run anywhere. The cling wrap is to stop the motor from being stuck in there as well. The mount is a very snug fit around the outer of the motor It's vital that the motor doesn't rub. If it does the motor will burn out, guaranteed!! These little motors work very hard and any extra load caused buy rubbing is a disaster. I also put a drinking straw on the shaft of the motor to help me get the thrust line close to zero. I Carefully check the drinking straw is on straight by spinning the motor before screwing it into the mount. What I aim for is as close to zero thrust as possible using the fuselage as a guide. If there's and deviation from zero then it wants to be slightly right or down definitely not left or up.


“The knack of flying is learning how to throw your machine at the ground and miss.”

"When once you have tasted flight, you will forever walk the earth with your thoughts turned skyward, for there you have been, and there you will always long to return."  ~Leonardo Da Vinci
Reply
#9

A bit more done this evening.
The motors were removed the cling wrap went taken away leaving the motor mounts nicely bonded to the fuselage. Then any extra glue that drooled out and might rub on the motor is removed with the Dermal.


The motor goes back in and after checking to make sure it doesn't rub anywhere all the screws are put in and tightened up firmly


The next step it to carve out a little pocket for the lipo pack to sit in. I just trace around the pack then use the same wheel on the dremel to open it out so the lipo pac drops in neatly and doesn't move about. Just like in the next pic.


I finish up by putting the pack in there and making sure the lid will sit down nice and flush


“The knack of flying is learning how to throw your machine at the ground and miss.”

"When once you have tasted flight, you will forever walk the earth with your thoughts turned skyward, for there you have been, and there you will always long to return."  ~Leonardo Da Vinci
Reply
#10

For servos I used HXT500s on the ailerons http://hobbyking.com/hobbyking/store/__6...Servo.html and 9g power HD's for elevator http://hobbyking.com/hobbyking/store/__4...ouse_.html

The HXT500s are thin enough to fit exactly flush with the botom of the wing tho' they are a little smaller in the other dimentions than the mounting holes in the wings.

The Power HD servo fits perfictly in it's mounting hole in the fusalage.

A dab of CA to tack them in place and a fillet of 5 min epoxy will secure them well.

With the elevators I put the z bend in the closest hole to the center, on the servo arm after drilling it out to be a snug fit on the wire. For rates on elevator I'm using 75% on high and 60% on low with 45% expo on both

With the ailerons I put the z bend on the second closest hole from the center. I would have liked to go to the closest in hole but it was so close in on the HXT500s that the linkage would bind and not work properly. For ailerons rates I'm using 70% on high and 42% on low with 50% expo on both.

The radio I'm using is an FRsky Taranis. Different servos and different radio & reciever combinations will give different controll throws. The main thing is that it should be able to be flown happily using full stick movements and not be twitchy when going flat out using low rates. There must be enough throws using high rates to give good controll responce at low speed when landing in windy or turbulent conditions.

Low rates for fast flight and high rates for landing is the way to set up a pylon model!!

The Taranis allows the use of flight modes which is handy it means that with a single switch both rates and trims are changed at the same time.
When flight mode one is active both elevator and aileron are set to low rates and the model is trimmed to fly at high speed.

When flight mode two is active both elevator and aileron are set to high rates and the model is re-trimmed for low speed. Seperate trims for all controlls are asigned to each flight mode.

When I used my DX6i I used the dual rate combi function to select all dual rates on the one switch, the aileron dual rates switch. It makes it easier that way. As for trims the DX6i doesn't have flight modes so I found it best to trim te plane for flat out full speed and just fly it on the sticks when it slowed up. It's not hard to do this and the trims don't change a huge amount. After all that's where it does it's job at absolutly flank speed, all it can muster so it's in that condition that it should be nicely trimmed.

I find it nicer to fly pylon with just a slight touch of down elevator trim. Trimmed like this, if the plane is getting too high I can just ease off the elevator rather than having to activly push down. It's also nice if it's line is getting a bit close in after comming around pylon #1. I can just stay knife edge after the turn and ease off the elevator and it will drift out, rather than rolling all the way to the right to get further out and then roll all the way back again to get around #2.

The Taranis has 3 position switches so I use the forward position for flight mode 1 and center and reaward switch position both set to flight mode 2.

I also use the custom features to have the radio say, "low rates" when flight mode 1 is activated and "high rates", when flight moded two is activated.

I use the custom features to have the radio tell me when 1 min is up and count down at the end of 2 mins.

2 mins because, that's it, two mins is all you get from a 4S 1000 mAh pack in a RareBear and it's all you need.

You want a timer set up on the radio so you don't over discharge those nice Lipos when practicing, If you do they won't be fast for long. They should come down between 3.7 and 3.8 Volts per cell. NO LOWER !!

When I'm racing I don't need a talking timer distracting me so I've set up a switch to turn the volume right down so I can't hear it. That way I can turn the timer sound on or off at any time with just the flick of a switch. (I spent some time tinkering with the Taranis to get it all set up how I like it, Its a bit of a chore but I think the results are worth while)

Balance on any model aircraft is critical!! The Rarebear has couple of small about 2mm diameter holes in the top survace of the wing. I'm not sure if it's deliberate but these holes are bang on the right spot to mark the G of G position. Its easier turn a low wing plane like the rareBear up side down to check the C of G.

The first of my Rarebears was quite nose heavy. It took 3, 5c peices zapped into a verticle slot cut in the very aft most point of the fuse to make it balance on these two holes.

Then I checked the lateral balance and it was a bit heavy on the port wing. I remembered reading somewhere that pylon models were often balanced with one wing heaver than the other to make them keep their nose up in the turns. But which wing it was I couldn't remember. A quick consoltation with the brains trust (thanks Towelly) confirmed that it's was the outer wing, so that meant that the right hand wing, looking from the pilot's point of view, should be slightly heaver than the left. Another 5c piece pushed into a slit cut in the end of the wing tip created just this recomended condition. Of course it goes with out saying that all balancing has to be done with the lipos, spinner, prop and canopy in place, if one wants to avoid a nasty suprise.

There are a few holes in the rarebear fuse and wings that need to be covered up to reduce drag 3M book binding tape is excellent for this, I put a strip allong the bottom of the fuse, as well, to stop it getting scuffed up when landing.

The first one pictured below flew really nicely after a bit of trimming and shortening of the elevator linkage. It's important to have the controll horn out at 90 degrees when it's trimmed center. Otherwise with the z bend so close in on the servo arm it will bind. Aside from that if the arm isn't out at 90 it will give a lot of movement in one direction and not much in the other.

This one flew really well!! I reckon it might just be the quickest one I've put together yet!


“The knack of flying is learning how to throw your machine at the ground and miss.”

"When once you have tasted flight, you will forever walk the earth with your thoughts turned skyward, for there you have been, and there you will always long to return."  ~Leonardo Da Vinci
Reply
#11

well . i have a rarebear to build tomorrow , i am using different gear due to things being out of stock , however this one will be my latest and lightest to date , i have my , ANGLE OF THRUST CUSTOM DIFFERENCES . But i will toy a little balance on this model . everything needs to be on the money with these things to get every km/ of speed and distance /time . then the flying skill comes into it also . choices of weight , balance , throws , and hardware , along with setup , propellors and custom tricks like lateral balance , cooling , airflow all come into it , on top of that there are also motor differences from factory , you can get a rip roarer or a dud by default . I'LL SEE YOU AT THE FIELD , BE THERE , BE FAIR , OR BE SQUARE . I INTEND TO BE ALL 3 .

OH AND REMEMBER ( CRASH AND CRY ??? -- - DONT FLY !! )

patience !!Biggrin paaatience !!Paranoid paaaaaatience Tounge paaaaaaatieeence Lol dooooohhhh !!! Upset


DANGER WIFE CAN READ FORUMS . love you darling . sig changed .
Reply
#12

HERES MY LATEST MK 9 .


Attached Files Thumbnail(s)
           

patience !!Biggrin paaatience !!Paranoid paaaaaatience Tounge paaaaaaatieeence Lol dooooohhhh !!! Upset


DANGER WIFE CAN READ FORUMS . love you darling . sig changed .
Reply
#13

That's amazing work guys Smile

It fascinates me to think of the scale speeds these planes reach. Wikipedia says a Bearcat has a wingspan of 10.92m, a max speed of 678km/h, and a takeoff weight of 4,354kg. That makes RC rarebears approximately 1:20 scale, given their 620mm wingspan.

20 cubed is 8000, so the scale weight of an RC rarebear would be around 2760kg, which means its a little less dense than the real thing (perhaps they should build the full-sized ones out of foam!).

However, if an RC rarebear goes 200km/h, I think it's achieving almost SIX times the scale speed of the full-sized version!

(20 x 200) / 678 = ~5.9

Does that make sense? To fly "scale" an RC rarebear should be going approximately 34 km/h, not 200km/h? Or to look at it from the other angle, an RC rarebear would be six times as exciting to ride in (FPV!) Smile
Reply
#14

That's interesting Andre!!
I did some scale calculations years ago working on wind speed and turbulence.
When you think of the scale factor in those terms it's pretty scary, an average day where the breeze comes up a bit in scale terms its like landing a Cessna in a cyclone.


Rarebears are doing about 155-160 in a straight line, you can get them a bit quicker in a dive but around the course it's not more than 155-160. The fastest Doppler from a race legal rarebear, (not the Frank R special) I've managed to get is 156 kph in a straight line (not in a dive.)

The course is 3300m that's the sides of the triangle added, then times 10 for the number of laps. When you include the radius for the corners and a bit of over run on the far pylon (No1) you can add 15% for a near perfect lap, so say 3800m. The NSW record for a fun fighter is 87.8 seconds it gives you an average of about 155. that is an exceptional time in perfect conditions with near perfect flying and a very fast plane. A good time, in the wind, on Sunday will be anything under 100 seconds.

None the less it's many times more than the true scale speed. Exciting stuff !!

“The knack of flying is learning how to throw your machine at the ground and miss.”

"When once you have tasted flight, you will forever walk the earth with your thoughts turned skyward, for there you have been, and there you will always long to return."  ~Leonardo Da Vinci
Reply
#15

Hey Jason is the std spinner faster than the small aluminium one?

"Fly it like you Stole it"
Reply
#16

(13-06-2014, 10:49 PM)secant0give Wrote:  The NSW record for a fun fighter is 87.8 seconds it gives you an average of about 155. that is an exceptional time in perfect conditions with near perfect flying and a very fast plane.

I suspect you missed a final key requirement, which is a blatant disregard for the existence of pylon 3. Lol

<table width="100%" border="0"><tr>
<td>
<span title="No longer arboreally challenged!">Parkzone Stinson SR-10 </span>
Extra-300S EPP
<del>F-18 Blue Angels 64mm EDF</del>
<span title="Why won't it die?!">HK Mini Cessna EPO</span>
Spektrum DX6i - Mode 1</td>
<td valign=top>
Parkzone T-28 Ultra Micro
E-Flite UMX BEAST
SRL Index
CloudsFly / AXN Floater
"2x6" basla/ply kit built glider
SBach 1000mm</td>
<td valign=top>
Skyartec Cessna 182 (small UAV)
UAV-168 (bigger UAV)
<span title="2nd-hand; rebuild on-hold">"BigBoy" Hugin (biggest UAV)</span>
<span title="For invading small countries">X-8 flying wing</span></td>
</tr></table>
Reply
#17

Pylon 3 ??

Oh yes, if he'd just made that visit to the optometrist, he may have seen the 3rd one.

BWWwwwwaaaaa HAAaaawwwwwwwAAA

Rhubarb........ Rhubarb........Rhubarb

“The knack of flying is learning how to throw your machine at the ground and miss.”

"When once you have tasted flight, you will forever walk the earth with your thoughts turned skyward, for there you have been, and there you will always long to return."  ~Leonardo Da Vinci
Reply
#18

well my rarebear has been setup , quite impressively now . Launching now does not get heavily effected by torque roll , ( The insiders will know what i mean ) , it's had some recent installs of proven equipment .

patience !!Biggrin paaatience !!Paranoid paaaaaatience Tounge paaaaaaatieeence Lol dooooohhhh !!! Upset


DANGER WIFE CAN READ FORUMS . love you darling . sig changed .
Reply
#19

(16-06-2014, 08:09 AM)rocket41 Wrote:  Hey Jason is the std spinner faster than the small aluminium one?

I believe that you do get a modest gain in speed from using the standard spinner. It's just that little bit less dragy.

The extra power required to gain more speed goes up by the cube of the increase in speed so even a small reduction in drag has an effect.

You do loose a little in cooling tho' and you must let the motor cool down between flights. If you fly back to back 3 or 4 flights you'll probably over heat the motor. I've done this in the past. Especially when useing the 5X5 Apc prop. That's why I tend to use the stock prop for practicing it draws a little less current and I don't have to worry about letting it cool down so much.

I found the ultimate way to decrease my time around the course was practice. If I fly a nice course then my times get a lot better!!

I remember when I started I was flying 123 to 127 or more seconds around the long course with my Q-500 now if I'm flying well and things are going good I'm down around 110 seconds even manage to do a few 105s. That's a huge gain from worst to best, around 20% just from flying better. To get that gain by an increase in speed I'd need to more than double the power of the engine or make a substantial reduction in drag!

Don't tell anyone tho'........ The key to going fast is really practice there is no substitute for stick time on the course. As SRL said to me once, and he was 100% right, you've just got to do the hours.

I can see it with Tony J, flying Q-500 this year, He's put in a bunch of stick time and it's really paying off. He's won Q-500 at both race days, so far this year and he's going to be real hard to beat at Nowra as well!!

I noticed it with my self last year, just before Richmond I had a week off. I was up at Boggabri, I marked out a course, I charged 6 packs at a time and every spare moment I had I stood there and flew around that course with my rarebear. I must have had close to 100 flights that week.
And it payed off, I won FFC class and came second in Q-500. My times had got much better!!

“The knack of flying is learning how to throw your machine at the ground and miss.”

"When once you have tasted flight, you will forever walk the earth with your thoughts turned skyward, for there you have been, and there you will always long to return."  ~Leonardo Da Vinci
Reply
#20

RAREBEARS BACK IN STOCK AT AU WAREHOUSE !!

http://www.hobbyking.com/hobbyking/store...duct=33635

Get one set up for the Willows cup !!

Well try and run another one later this year in the winter when the weather is usually a little dryer

“The knack of flying is learning how to throw your machine at the ground and miss.”

"When once you have tasted flight, you will forever walk the earth with your thoughts turned skyward, for there you have been, and there you will always long to return."  ~Leonardo Da Vinci
Reply


Forum Jump:


Users browsing this thread: 1 Guest(s)