04-02-2011, 06:13 PM
JohnP was I think, the first in our club to discover the Blu-Baby Trainer (http://www.rcgroups.com/forums/showthread.php?t=681556).
My instructor says that I should have another plane in the hangar to fly solo with and I think the Blu-Baby might be the ticket. John's example looked good to me and I thought I might get one together. I haven't worked with depron before so it seemed like an opportunity to put other things aside and get started.
The RCGroups Blu-Baby thread is over a thousand pages long, so I read a few of them and made a couple of decisions ...
- Will build the 42" version because it suits a spare powertrain I already have, and the extra size might help me keep it sighted.
- Also, must build the aileron version because I think I'd be lost without ailerons.
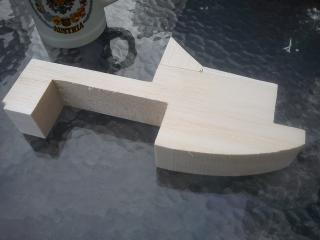
Printed out the plan sheets and stuck them all together. The first task was cutting the so-called monobloc. This is normally made from pink/blue foam or even laminates of depron up to the required thickness. I had a large block of balsa lying around unused and it was about the right thickness, so used it instead. Having access to a band-saw made this job easy, otherwise it would have been difficult to cut by hand and keep square.
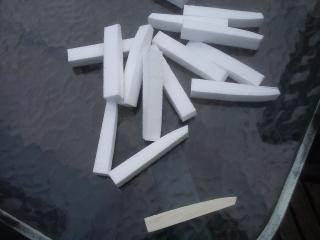
While the band-saw was handy, cut a bunch of styrofoam semi ribs for the wings. These are nice and wide and will go from the leading edge back to the wooden spar. Made from off-cuts of foam packing.
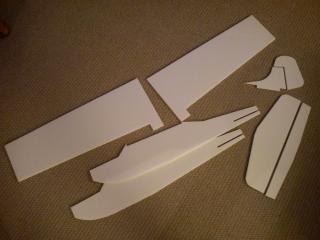
Now cut all the depron parts (well, most of them anyway) from 6mm depron. This is easy as long as the scalpel blade is very sharp and gives a satisfying but false sense of significant progress, compared to building a model up from balsa.
OK, that's it for one session - need to have a couple of beers and think about options before lurching forward.
OK, last post work done over a week ago, I'm just catching up with my progress here.
The wing was next to receive treatment. The original version called for a rolled, undercambered depron structure but reading through the posts indicates that it tended to flex too much. An alternative was a Kline-Fogelman aerofoil but I decided to go for the built-up sport wing just for fun. Started off with some balsa leading edge stock, chamfered the depron to butt against it and stuck the semi-ribs on. I was using UHU-Por as the glue because I hadn't tried it before and it's apparently "the go" for depron.
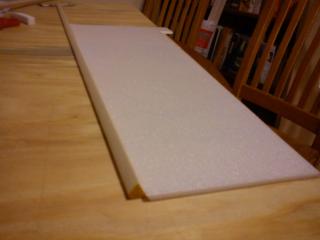

Next was to get the timber spars in place, would have used some CF box-section instead if I'd had some at hand - never mind, wood would do! Some little recessed boxes in the undersides of the wings for the aileron servos to come later and some depron semi-ribs between the spar and the trailing edge. The aerofoil is a flat-bottomed section, but I simply sketched it out by hand - it doesn't represent any properly designed NACA or other design.
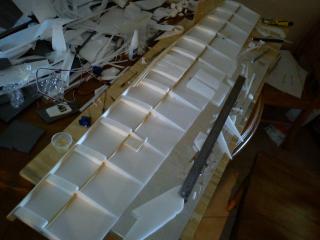
The upper surfaces were then covered with 2mm depron, after having ensured some pieces of cotton were placed inside the wing so that I could pull the servo leads and extensions through later. The next photograph shows the wing root with the spruce spar and guide ready for the two ply dihedral braces to be glued in.

I attended to aileron hinges before cladding the top surface of the wing - this was done by gluing hinges to the top the 6mm depron wing undersurface and then sandwiching them beneath the 2mm top surface. This saves having to cut slots afterwards and guarantees that they're solidly glued in place.

A slight departure from the plan was next (yes, I'll take full responsibility and I know I might regret it). The cavity for the battery-bay in the underside of the mono-block was too small for the 2200 mAh batteries I want to go in there (so I don't have to buy another battery size variation). I extended the size of the bay towards the front. This meant that the standard undercarriage mounting position was now cut away though. It would be a good idea to keep the undercarriage legs in the same position, so some holes were bored into the block above the battery-bay and grooves cut into the block so that legs could be inserted from each side and set into the grooves with a forward rake.
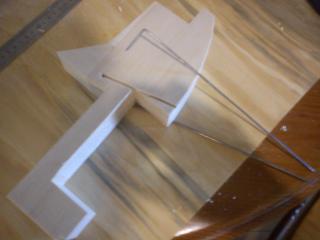
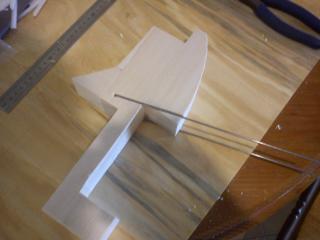
Some extra grunting and farting later, we have bent undercarriage legs in the correct position and once set with expoxy they should be strong enough to deal with my clumsy landings.

Right now, it's beer-o'clock again so more to come later ...
My instructor says that I should have another plane in the hangar to fly solo with and I think the Blu-Baby might be the ticket. John's example looked good to me and I thought I might get one together. I haven't worked with depron before so it seemed like an opportunity to put other things aside and get started.
The RCGroups Blu-Baby thread is over a thousand pages long, so I read a few of them and made a couple of decisions ...
- Will build the 42" version because it suits a spare powertrain I already have, and the extra size might help me keep it sighted.
- Also, must build the aileron version because I think I'd be lost without ailerons.
Printed out the plan sheets and stuck them all together. The first task was cutting the so-called monobloc. This is normally made from pink/blue foam or even laminates of depron up to the required thickness. I had a large block of balsa lying around unused and it was about the right thickness, so used it instead. Having access to a band-saw made this job easy, otherwise it would have been difficult to cut by hand and keep square.
While the band-saw was handy, cut a bunch of styrofoam semi ribs for the wings. These are nice and wide and will go from the leading edge back to the wooden spar. Made from off-cuts of foam packing.
Now cut all the depron parts (well, most of them anyway) from 6mm depron. This is easy as long as the scalpel blade is very sharp and gives a satisfying but false sense of significant progress, compared to building a model up from balsa.
OK, that's it for one session - need to have a couple of beers and think about options before lurching forward.
OK, last post work done over a week ago, I'm just catching up with my progress here.
The wing was next to receive treatment. The original version called for a rolled, undercambered depron structure but reading through the posts indicates that it tended to flex too much. An alternative was a Kline-Fogelman aerofoil but I decided to go for the built-up sport wing just for fun. Started off with some balsa leading edge stock, chamfered the depron to butt against it and stuck the semi-ribs on. I was using UHU-Por as the glue because I hadn't tried it before and it's apparently "the go" for depron.
Next was to get the timber spars in place, would have used some CF box-section instead if I'd had some at hand - never mind, wood would do! Some little recessed boxes in the undersides of the wings for the aileron servos to come later and some depron semi-ribs between the spar and the trailing edge. The aerofoil is a flat-bottomed section, but I simply sketched it out by hand - it doesn't represent any properly designed NACA or other design.
The upper surfaces were then covered with 2mm depron, after having ensured some pieces of cotton were placed inside the wing so that I could pull the servo leads and extensions through later. The next photograph shows the wing root with the spruce spar and guide ready for the two ply dihedral braces to be glued in.
I attended to aileron hinges before cladding the top surface of the wing - this was done by gluing hinges to the top the 6mm depron wing undersurface and then sandwiching them beneath the 2mm top surface. This saves having to cut slots afterwards and guarantees that they're solidly glued in place.
A slight departure from the plan was next (yes, I'll take full responsibility and I know I might regret it). The cavity for the battery-bay in the underside of the mono-block was too small for the 2200 mAh batteries I want to go in there (so I don't have to buy another battery size variation). I extended the size of the bay towards the front. This meant that the standard undercarriage mounting position was now cut away though. It would be a good idea to keep the undercarriage legs in the same position, so some holes were bored into the block above the battery-bay and grooves cut into the block so that legs could be inserted from each side and set into the grooves with a forward rake.
Some extra grunting and farting later, we have bent undercarriage legs in the correct position and once set with expoxy they should be strong enough to deal with my clumsy landings.
Right now, it's beer-o'clock again so more to come later ...
Steve Murray


